Module Arguments
Problem still stands that we now have two modules that are almost identical but not quiet, pin2 was supposed to be temporary.
we can resolve this issue by using module arguments, lets start by comparing the two modules.
module pin() {  translate([0,pivotRadius,hingeHalfExtrudeLength+tiny]){    cylinder(h=hingeLength/2+clearance/2, r1=pinRadius, r2=pinRadius+pinTaper);  }}
module pin2() { translate([0,pivotRadius,hingeHalfExtrudeLength+tiny]){ rotate([0,180,0]){ cylinder(h=hingeLength/2+clearance/2, r1=pinRadius, r2=pinRadius+pinTaper); } }}The only difference between the two is the rotate in pin2, further if we add a rotate([0,0,0]) to pin it has no effect on the shape but it it does mean now the only difference between the two is the amount the pin is rotated.
module pin() {  translate([0,pivotRadius,hingeHalfExtrudeLength+tiny]){    rotate([0,0,0]) {      cylinder(h=hingeLength/2+clearance/2, r1=pinRadius, r2=pinRadius+pinTaper);    }  }}
module pin2() { translate([0,pivotRadius,hingeHalfExtrudeLength+tiny]){ rotate([0,180,0]){ cylinder(h=hingeLength/2+clearance/2, r1=pinRadius, r2=pinRadius+pinTaper); } }}This is perfect for an argument! What's an argument? Its a value that we can pass into the module instead of having to define it ahead of time, this makes our module more flexible.
Here's how we'd modify pin to use an argument for the rotation:
module pin(rotateY) {  translate([0,pivotRadius,hingeHalfExtrudeLength+tiny]){    rotate([0,rotateY,0]) {      cylinder(h=hingeLength/2+clearance/2, r1=pinRadius, r2=pinRadius+pinTaper);    }  }}
pin(0);pin(45);pin(120);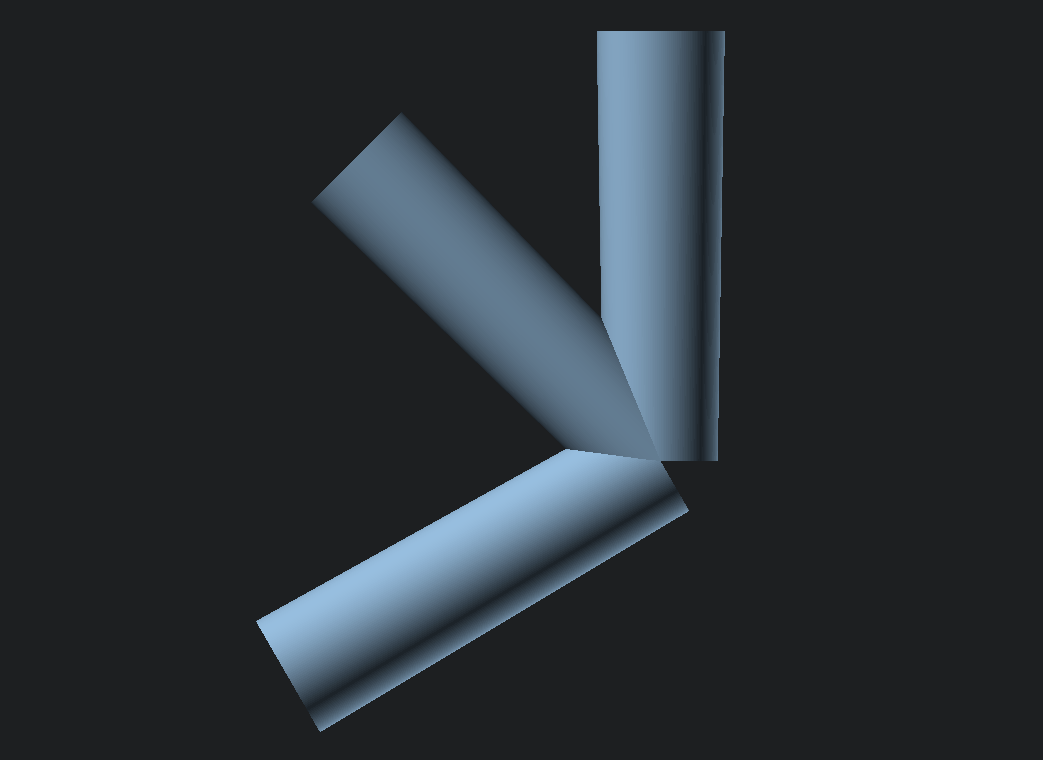
Earlier I said that the syntax for modules was module yourName() { /* your code */ }, lets revise that to module yourName(yourArguments) { /* your code that uses arguments */ }.
As you can see we're using the argument rotateY within rotate so that that we can change pin's orientation each time we use it by as demonstrated by using 0, 45 and 120.
An argument is much like a variable in that we should name it well, the difference is that it's passed to a module and can only be used within the module.
Here our code using our new module instead of pin2
// ... rest of code abovemodule pin(rotateY) {  translate([0,pivotRadius,hingeHalfExtrudeLength+tiny]){    rotate([0,rotateY,0]) {      cylinder(h=hingeLength/2+clearance/2, r1=pinRadius, r2=pinRadius+pinTaper);    }  }}
difference() { hingeBodyHalf(); // I wouldn't count 180 as a "magic number" // since it's easy to tell it's for a half turn pin(rotateY=180);}And now we can use the pin as both the hole and the shaft, above is code for the hole, and both together are below:
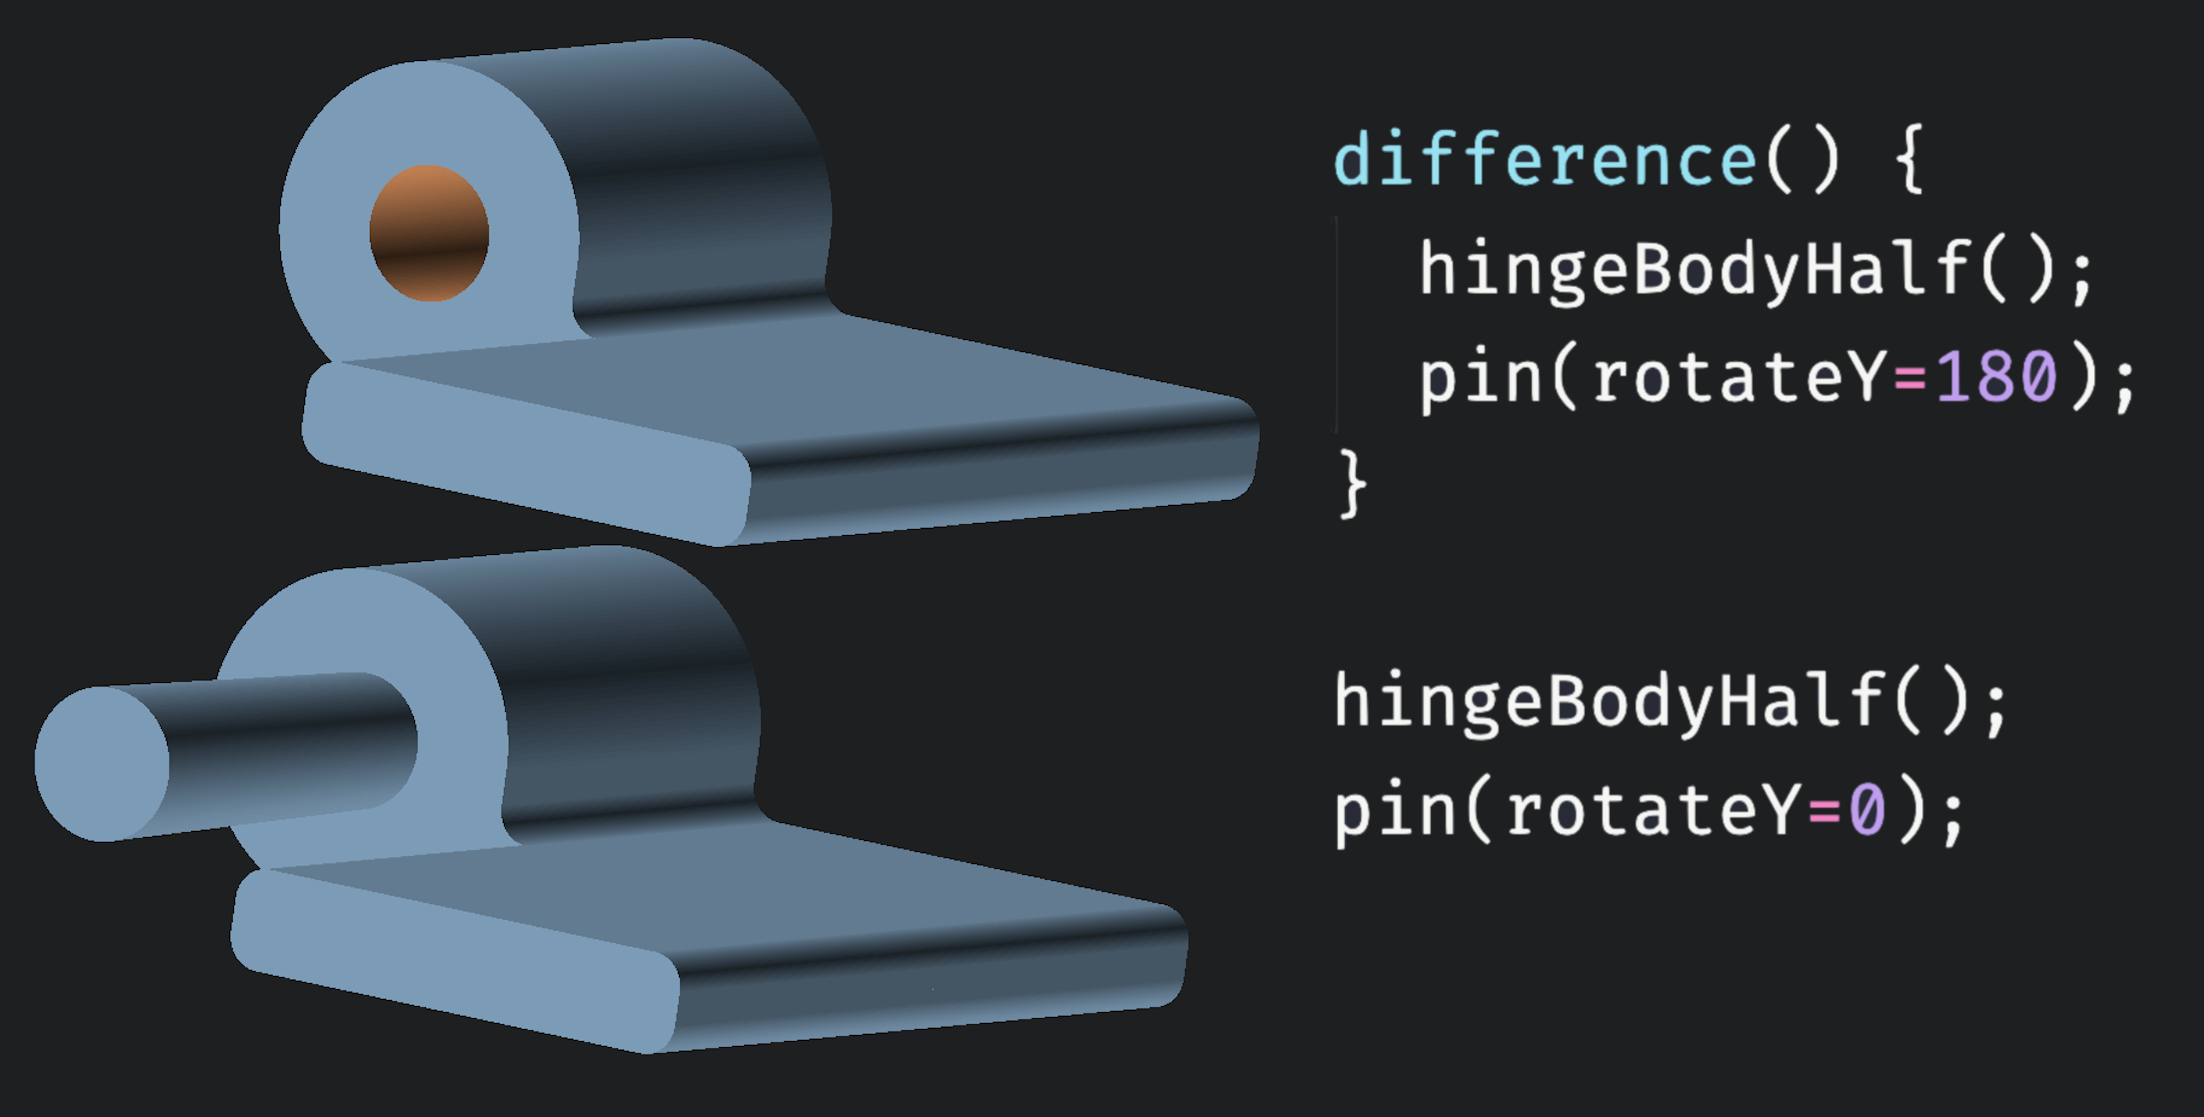
We're still not done with pin though! one more thing. Technically we can use the same module pin for the hole and shaft, but practically we can't because we haven't added any clearance between the two.
If we tried to print these together they would print solid.
We can fix this with another argument that makes the hole a bit larger:
module pin(rotateY, radiusOffset) { translate([0,pivotRadius,hingeHalfExtrudeLength+tiny]){ rotate([0,rotateY,0]) { cylinder( h=hingeLength/2+clearance/2, r1=pinRadius+radiusOffset, r2=pinRadius+pinTaper+radiusOffset ); } }}The new argument allows us to increase the radius of the pin, here's an exaggerated example:
That's too much clearance just to demonstrate the principle, in reality we'll use the clearance variable that we've already defined with a value of 0.2. We're ready to put the hinge together now, lets make two modules hingeHalfMale and hingeHalfFemale which will be assemblies of modules we've already made.
// ... previous module definitions abovemodule hingeHalfFemale() {  difference() {    hingeBodyHalf();    pin(rotateY=180, radiusOffset=clearance);  }}
module hingeHalfMale() {  translate([0,0,hingeLength]) {    rotate([0,180,0]) {      hingeBodyHalf();      pin(rotateY=0, radiusOffset=0);    }  }}
%hingeHalfFemale(); // make female hinge transparenthingeHalfMale();Well done, it's really coming together (I made the female hinge transparent so we can see how it fits together). The only thing left to do is add mounting holes on the plates.